Talk to Our Engineer, Get a Solution in 20 minutes

Our engineers are the expert in vacuum forming products, you can let them know any requirements and specific demands, then they work out the solution soonest and send back it for free.
Product Inquiry

How to Improve ABS Vacuum Forming

A hands-on guide for engineers and production managers explaining five core ABS thick-sheet forming problems, practical tests and SOPs, and measurable fixes you can implement today to cut defects and lift first-pass yield.


Introduction

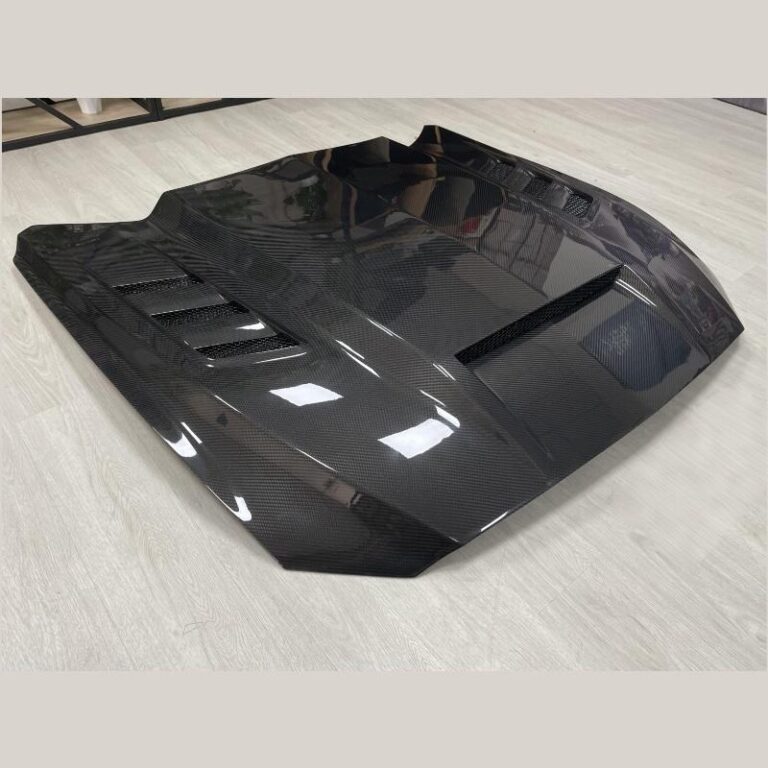
Vacuum forming ABS thick sheets is economical and versatile, but hidden variables — residual stress, moisture, uneven heating, oxidation and inadequate pretreatment — regularly cause costly failures. This post translates the science behind those failures into workshop-ready checks, SOPs and experiments you can run immediately. Read on for evidence-backed causes, quick diagnostic tests (including production-friendly stress tests), and quantifiable fixes that lead to repeatable first-pass success.


1. Internal stress (stress cracking) — why it forms and a compact annealing SOP

Why it matters
A part that looks fine off the mold can crack later during plating, assembly, or use. Those cracks are almost always residual stress finding a weak path — invisible at first but expensive later.

What’s happening
Uneven stretching and cooling lock polymer chains into higher-energy states at thin sections or sharp corners. Chemical or mechanical loading later releases that energy as crazing or cracks.

Detection

  • Visual: crazing, fine lines, localized whitening.
  • Chemical spot test: glacial acetic acid swab/immersion (use PPE and SOP). Stressed zones craze faster.
  • Mechanical: simple bend/flex coupon test.
  • Thermal: IR gradients and thermal logs to spot likely hotspots.

Actionable annealing SOP (copy/paste)

  • Purpose: relieve residual stress before finishing.
  • Applicability: ABS shells up to ~12 mm (adjust by mass).
  • Settings: 70–80 °C for 2–4 hours, then slow cool to <40 °C (leave oven door closed 1–2 hours) — heavier parts: extend to 4–6 hours.
  • Acceptance: acetic acid spot or bend test on coupon — no craze in 48 hours.
  • Record: oven ID, ramp times, part IDs, operator initials.

Prevention (design & tooling)
Add fillets (r > 1.5× wall thickness where possible), avoid abrupt thickness changes, and iterate tool geometry from stress-test results.


2. Melt flow and forming (rheological behavior) — translate material rheology into forming recipes

Why it fails
ABS is pseudoplastic: viscosity drops with temperature and shear. Deep draws and complex contours cause uneven stretches and unpredictable thickness distributions.

Measure and validate

  • Thickness mapping at critical points (ultrasonic gauge/CMM).
  • Three-step forming trials: baseline, nominal, +10% dwell.
  • Calculate local stretch ratios (pre vs post geometry).

Practical solutions

  1. Tune preheat/dwell for deep areas (prefer dwell adjustments over max temp increases).
  2. Use plug assist / pre-stretch for deep draws.
  3. Combine vacuum and positive pressure when detail and distribution are both required.
  4. Control clamp/support friction and uniformity.

Validation plan (example)

  • Week 0: baseline map. Week 1: +10% dwell map. Week 2: plug assist trials. Week 3: SPC on thickness (target Cp ≥ 1.33). Week 4: lock SOP.

3. Thermal stability and antioxidant additives — limit colour drift and molecular damage

What to watch for
Yellowing, streaking or brittleness indicate thermal oxidative degradation — usually local overheating in oxygen.

Guardrails

  • Choose ABS grades with antioxidants (Irganox/Irgafos types) when color stability matters.
  • Limit dwell at high temps; avoid extended exposure in oxygen.
  • If discoloration appears: stop, photograph, isolate batch and review oven logs.

Quick test
Run coupons at current schedule and +10% dwell; inspect after 24–72 hours for color changes. If present, reduce dwell or select a stabilized grade.


4. High water absorption — drying policy that avoids bubbles and dimpling

Why drying matters
Moisture becomes steam during heating and makes bubbles, white spots and surface dimples that ruin appearance and adhesion.

Factory-ready drying policy

  • Target residual moisture: <0.1–0.4% by weight depending on end use.
  • Typical cycles: 80–85 °C for 2–4 hours (general). 70–80 °C for 18–24 hours (plating/high-gloss).
  • Verification: gravimetric test (weigh → dry → reweigh) or moisture meter. Record results on lot release.
  • Handling: sealed boxes or desiccant storage; label dried batches with “dry complete” timestamp and “use by” (e.g., 24–48 h).

Quick tip
Limit time between drying and forming; use desiccated cabinets if delays are expected.


5. Processing temperature and dwell time — convert temperature control into consistent color and springback

Control points

  • Upper vs lower surface delta: aim < 5–8 °C (tighter for thin/plating parts).
  • Map oven uniformity across platen with thermocouples.
  • Keep batch logs: set temp, measured surface temps, dwell, part ID.

Tools & checks

  • IR camera spot checks before forming.
  • PID tuning to reduce overshoot and increase soak time if necessary.
  • Avoid stacking hot sheets — creates nonuniform preheat histories.

6. Surface post-treatment and electroplating requirements — plating is a higher-control product line

Why plating fails
Plating exposes latent stress, moisture, contamination and variability from recycled content — causing adhesion failures and color inconsistency.

Plating line policy highlights

  • Dedicated material silo and lot numbers for plating-grade ABS.
  • Limit recycled content unless supplier certifies parity.
  • Incoming checks: moisture, spectrophotometer color, melt-flow or CoA.
  • Pretreatment: degrease → etch → plasma/corona as needed; run adhesion coupons.
  • Acceptance: measurable ASTM crosshatch adhesion score target before full run.

7. Quality control & continuous improvement — make data your decision engine

Minimal traceability table (fields)

  • sheet lot no. | supplier | moisture % | oven ID | preheat set (°C) | dwell (min) | forming recipe ID | anneal (Y/N) | plating? | inspection result | operator | timestamp

KPIs to track weekly

  • first-pass yield (%) by part family
  • defects per 1,000 parts (categorized)
  • oven uniformity delta (°C) trend
  • moisture out-of-spec count per lot

Shop-floor experiment (4-hour Kaizen)

  1. Select worst part family.
  2. Run 2–3 controlled experiments (change one variable).
  3. Measure thickness, visual defects, color.
  4. Lock best recipe and update SOP.

Troubleshooting matrix — symptoms → probable causes → immediate action → long-term fix

SymptomProbable causeImmediate actionLong-term fix
Hairline cracks after platingResidual stressIsolate parts; anneal sample batch; pause plating if many failuresRedesign corners, anneal all plating lots, add stress-test gate
Surface bubbles/white spotsMoistureStop run; test moisture; dry current sheetsImplement drying SOP; label dried batches
Yellow streaksLocal overheat/oxidationStop oven; photograph; pull suspected lotsOven mapping/repair; use stabilized grade
Thin walls in deep drawExcessive local stretchingReduce stretch rate; try plug assistAdjust forming recipe; lock thickness mapping
Poor plating adhesionContamination/recycle contentHalt plating; test contaminationSeparate silo, stricter incoming QC, pretreatment SOP

Printable operator checklist

  • Drying: 80–85 °C × 2–4 h (general) — plating: 70–80 °C × 18–24 h.
  • Preheat: IR check center/left/right — delta ≤ 5 °C.
  • First-piece thickness map: record 6 key points.
  • Stress test (plating/large parts): acetic acid spot on coupon.
  • Anneal (if suspected stress): 70–80 °C × 2–4 h, slow cool.
  • Log: sheet lot, oven ID, preheat temps, dwell, operator initials.

SOP snippets to paste into work instructions

Incoming material release — quick checklist

  1. Verify supplier lot and CoA.
  2. Measure thickness at 5 sample points (tolerance ±X mm).
  3. Gravimetric moisture test or moisture meter — accept only if < target.
  4. Tag lot “released for use” with timestamp and operator initials.

Preheat verification before forming

  • Perform three IR spot checks (center, left, right) after soak; record. If any reading deviates >5 °C from setpoint, hold run and adjust.

Action plan: what to implement now and what to roadmap

This week (quick wins)

  • Add drying tags with timestamps for all batches.
  • Start first-piece thickness mapping for every run.
  • Add acetic acid spot test gate for plating lots.

This month (medium effort)

  • Map ovens and generate thermal uniformity reports.
  • Trial plug assist for deep draws and record thickness distributions.
  • Create plating material silo and incoming QC gates.

Quarter roadmap

  • Implement SPC charts for critical thickness points and corrective triggers.
  • Rework tooling to remove stress hotspots found in tests.
  • Align suppliers on antioxidant grades and recycled content thresholds.

Conclusion

ABS thick-sheet vacuum forming is a reliable, cost-effective manufacturing process — when you treat it like a materials problem as well as a tooling problem. Focus on five control areas (stress, rheology, thermal stability, moisture, and temperature/dwell) and add a plating-grade workflow where needed. Translate the recommendations above into written SOPs, measurable targets and batch logs: small, quantifiable changes here produce large improvements in first-pass yield and customer satisfaction.


FAQ (short)

Q: What single change most reduces plating failures?
A: Enforce a plating-grade material silo + thorough drying and a stress-test gate before plating.

Q: How often should I anneal parts?
A: For plating or high-risk parts, anneal every lot post-forming; for others, anneal only if stress tests or visual cues indicate it.

Q: How to quickly check moisture on the shop floor?
A: Use a moisture meter for representative sheets and a gravimetric lab test for verification.

Comments

Blog Comments
Share your love
logo

Company

About Us
Products
Materials
Industries
Services
Contact Us
Blog

Products

ABS Vacuum Forming
Acrylic Vacuum Forming
HDPE Vacuum Forming
PETG Vacuum Forming
PC Vacuum Forming
PP Vacuum Forming
HIPS Vacuum Forming
PVC Vacuum Forming