Talk to Our Engineer, Get a Solution in 20 minutes
Our engineers are the expert in vacuum forming products, you can let them know any requirements and specific demands, then they work out the solution soonest and send back it for free.
The Advantages and Disadvantages of Vacuum Forming
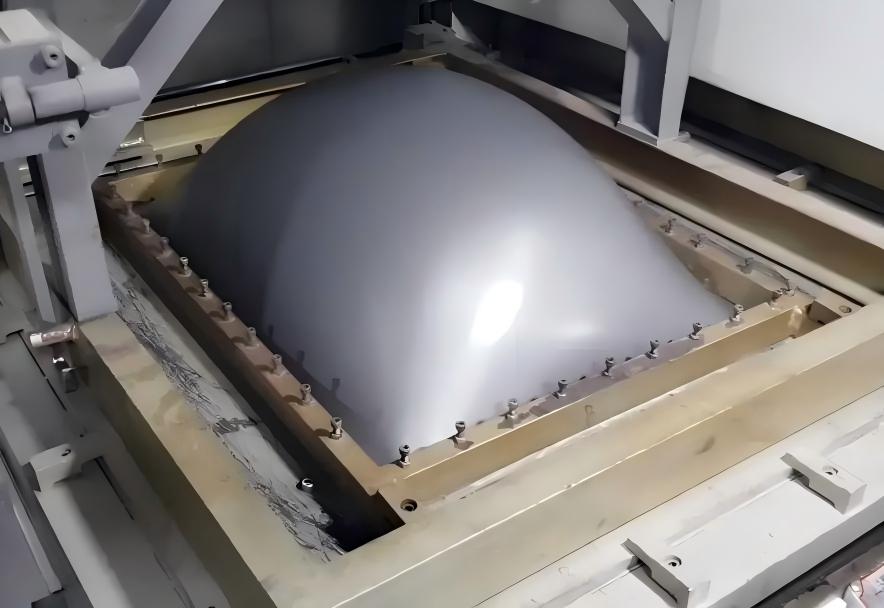
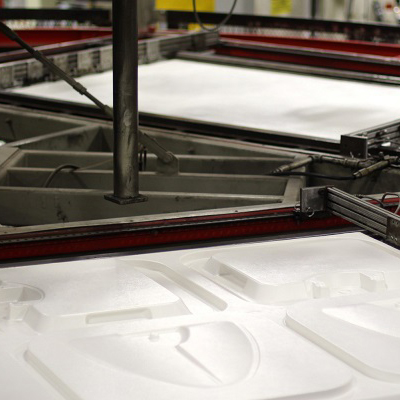
Short intro Vacuum forming is deceptively simple: heat a plastic sheet until soft, pull it over a mold, and use a vacuum to make the sheet hug the shape. What sounds like “heat and suck” actually gives teams a powerful mix of speed, scale and flexibility — if you design around the process. Below I’ll walk you through the real advantages and disadvantages, how to decide if it’s the right tool for your project, and practical, engineer-grade advice (including failure modes, mitigation, and newer hybrid workflows many guides skip).
Why vacuum forming is so widely used (and when it shines)
Vacuum forming is popular because it wins where time-to-first-part, large part size, and low upfront tooling cost matter:
Speed to prototype — you can go from CAD to a working part in days using wood, aluminum or even 3D-printed molds. That short loop changes how teams iterate.
Cost profile that favors large, shallow parts — big housings and trays are often cheaper to produce with formed sheet than by injection molding because tooling for injection gets very expensive as part size increases.
Material flexibility — commonly formed polymers include ABS, HIPS, PETG, PVC, PC, and PP; you can choose clarity, flame rating, or impact resistance to match the product function.
When to pick vacuum forming quickly: you need a quick prototype, the part is large/relatively shallow, and tolerances are moderate (not ±0.1 mm on tiny features).
What are the real advantages?
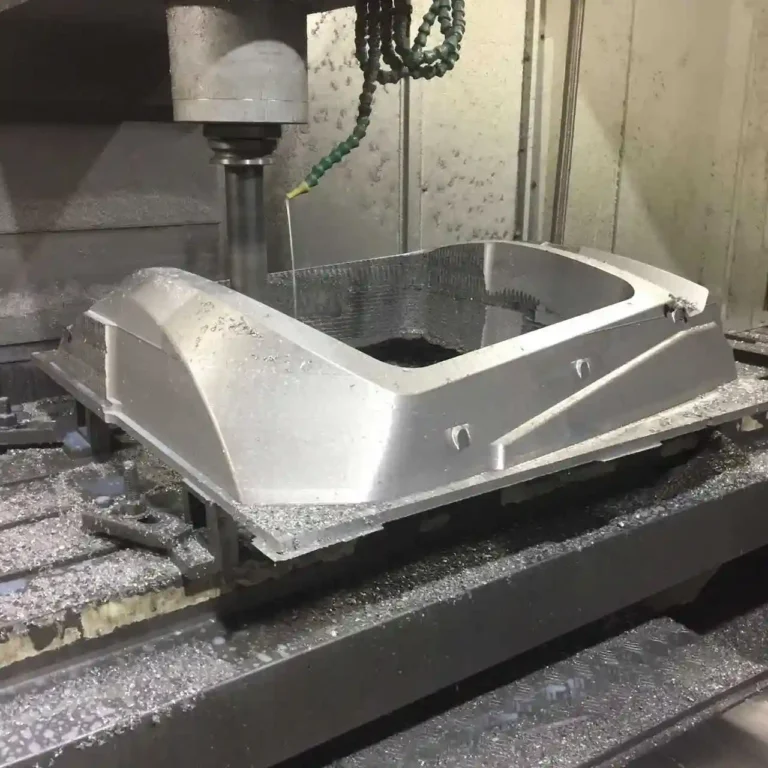
Low upfront tooling cost — molds can be simple wooden masters, machined aluminum for longer runs, or SLA/FDM 3D-printed fixtures for fast turnarounds. That keeps initial capital low.
Fast iteration loops — cheaper, quicker tooling = more design iterations before committing to expensive production tooling.
Economical for large parts — very large panels and housings can be formed at far lower cost per part than injection molding for short to medium runs.
Relatively green opportunities — trim scrap is commonly reclaimable and certain formed sheets can include recycled content; with careful nesting and material choice, waste and energy per part can be reduced. (More below.)
Accessible finishes — textured molds or sanding/polishing of molds can deliver a wide range of surface finishes without complex secondary processes.
What are the practical disadvantages?
Detail & undercut limitations — vacuum forming struggles to reproduce deep undercuts or very fine, sharp features. If you need crisp micro-textures or complex internal hooks, pressure forming or injection molding is usually required.
Wall-thickness variability — as the sheet stretches over the mold, thin sections thin further. Critical thinness or uniform section requirements need special design or pressure forming.
Tighter tolerances are expensive — holding tight dimensional control or ±0.5 mm on small features is often impractical without more advanced tooling and process control.
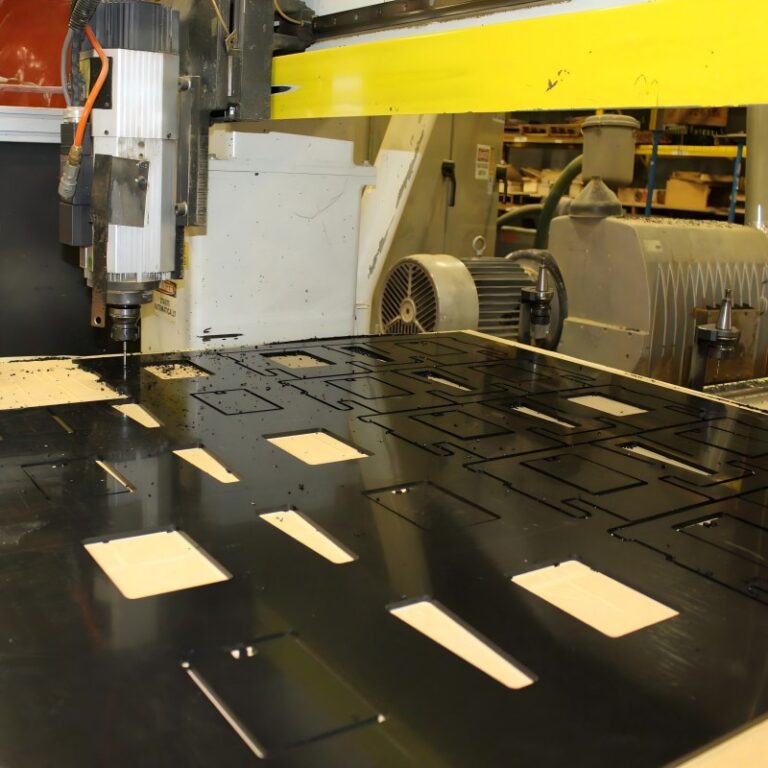
Post-processing — trimmed parts, inserts, secondary bonding or fastener installation add labor and cost that must be included in quotes.
Material & processing sensitivity — forming temperature windows, heating uniformity, and operator skill affect final part quality; some polymers require precise thermal control. (See practical numbers below.)
Real, practical numbers and guidelines (use in design reviews)
Draft angles: 3°–5° minimum on vertical faces to reduce tearing and aid release. Larger draft makes trimming easier.
Typical sheet thicknesses: 0.5 mm — 6 mm for hobby/industrial vacuum forming; common production bands are 0.75–3 mm for consumer parts, and 3–6 mm for heavy-duty panels.
Heat/time rule of thumb: forming time scales with material and thickness — for example, Toolcraft lists typical heat times increasing with thickness and thermoplastic type (ABS and PC take longer than PETG or HIPS). Use supplier tables during set-up.
When to prefer pressure forming: need for crisp detail, near-uniform wall thickness, or high cosmetic fidelity. Pressure forming uses positive pressure in addition to vacuum and transfers mold detail better.
Design-for-Vacuum-Forming (DfVF) checklist — what to do before the prototype quote
Avoid sharp internal corners; prefer 0.8–2 mm radii depending on scale.
Limit deep draws; if a feature is deeper than ~2× the smallest lateral dimension, break the part into multiple pieces.
Use uniform wall sections where strength is needed — distribute stretch evenly.
Add generous draft angles (3°–5°+) and consider parting lines and trim allowance early.
Design bosses and screw features for inserts (heat-set, ultrasonic) rather than forming precise thin bosses from the sheet alone.
Failure modes, why they happen, and how to fix them (engineer’s checklist)
Blisters or bubbles — caused by overheating, trapped moisture, or contaminants. Fix by drying sheets, lowering heater temps, or improving vacuum path.
Wrinkling around deep draws — reduce draw depth, add pre-heating patterns, or use plugs/assist tools to control material flow.
Thin spots or tears at corners — add larger radii, use thicker sheet, or split geometry into multiple tools.
Poor surface replication — polish or texture the mold, or move to pressure forming when you need near-mirror transfer.
Modern upgrades competitors often miss
1) 3D-printed molds as a standard rapid-iterate strategy
High-quality SLA or engineered FDM molds let teams try complex surface textures and geometry without expensive CNC work. Post-process the print (sanding, sealing) and you get cosmetically useful molds in days. This is the pragmatic “best of both worlds” for prototypes and short runs.
2) Recycled-content and reclaim strategies
Thermoforming lends itself to reclaiming trim scrap and regrinding certain offcuts for reuse in non-critical applications. Some suppliers now offer sheets with certified recycled content; pairing nesting strategies with reclaim loops meaningfully reduces cradle-to-gate impact. If sustainability is part of your product story, quantify reclaimed % and end-of-life recyclability in specs.
Form the main envelope with vacuum forming, then CNC cut and fit milled brackets or metal inserts where structural stiffness is required. This hybrid path gives the speed of formed sheet and the structural precision of CNC.
Quick decision flow — is vacuum forming right for your part?
Answer these:
Is the part large and mostly shallow? → vacuum forming favored.
Do you need very fine features or tight small tolerances? → consider pressure forming or injection molding.
Are volumes low to medium (prototypes → low thousands)? → vacuum forming often cheaper. For tens of thousands, run unit-cost models vs injection.
Is recycled content or reclaimability required? → discuss sheet options with suppliers; vacuum forming can integrate reclaimed material flows if planned.
Short case sketch (realistic, practical example)
Imagine a 600 × 400 mm retail kiosk top with moderate Drafts, one pocket and two mounting bosses. Injection tooling for that size is extremely expensive; vacuum forming (3 mm ABS sheet on a machined male mold, trimmed and fitted with heat-set inserts) will usually be faster and cost less for runs under several thousand units. If you need glossy, micro-textured logos transferred precisely, upgrade to pressure forming or use a textured aluminum mold. (This is the standard tradeoff teams face in production planning.)
TKP Plastic is China's leading provider of vacuum forming solutions. We are defined by our commitment to innovation, uncompromising quality, and total customer satisfaction. Our expertise enables us to deliver projects that excel in cost-effectiveness, intricate design, and sustainable manufacturing. Partner with TKP to bring your vision to life with precision and reliability.